

How To Use Device List In Meye App
Hi, welcome to use Sonoff 433 RF Bridge! One RF Bridge supports to add up to 4 RF Remote on the App. Now let's get started using it.
1. Download "eWeLink" app
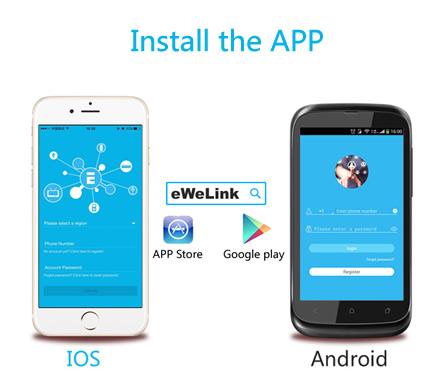
Search "eWeLink" in APP Store for iOS version or Google play for Android version. The App supports to add 433MHz RF Remote, 433MHz RF IR sensor, 433MHz RF door sensor.
Please note that only Android V2.4.0 and higher support adding this product. iOS 2.5.0 supports this product. Please uninstall your app and update to the latest version.
What are supported in V2.5.0 and higher versions?
1. Timing function
2. iOS App can add this product
2. Add device

1. Power up the RF Bridge with a micro USB cable. The green led will light up.

2. Enter into pairing status: Use a screwdriver or pen to press and hold the pairing button for 7s until the blue led fast blinks 3 time and repeats.
3. Add to your account
Open eWeLink, tap "+" to add it.
For Android users, please select the first icon, click NEXT.
For iOS users, please select the corresponding icon according to the flashing led, click NEXT.
EWeLink will auto-search and connect to the device.

4. Input your home SSID & password:
4.1 If no password, keep it blank.
4.2 Now eWeLink only support 2.4G WiFi communication protocol, 5G-WiFi is not supported.


5. Name the device to complete.
6. Maybe the device is "Offline" on eWeLink, for the device needs 1-2 minutes to connect to your router and server. When the green LED on, the device is "Online", if eWeLink shows still "Offline", please close eWeLink and re-open.
3. Add RF Remote
Prepare a 433MHz RF Remote.


-
-
- Enter into the RF Bridge control interface. Tap "+" to add RF
Remote. Please note that no matter what type of RF Remotes, the maximum number you can add is 4 (1-4 button/Curtain/Alarm).
- Enter into the RF Bridge control interface. Tap "+" to add RF
-

- Select the RF Remote with correct buttons. If you want to add
an RF Remote with 4 buttons, then select the 4 buttons, click Confirm. Then you'll see the 4 buttons device on the interface. As you can see there are Button0, Button1, Button2, Button3, you'll need to pair the buttons with RF Remote button A B C D one by one. - If you want to add 433MHz RF IR sensor or 433MHz RF door sensor, please select Alarm.
- Learning with RF buttons: press and hold Button0 on the App until you hear a beep sound from the RF Bridge, the red led of RF Bridge will start fast blink, which means it has entered into learning mode. Then quickly press the A button of RF Remote. You'll hear two beep sounds, and the red led of RF Bridge will blink twice. This means it has learned successfully. The Button0 will lighten. If you use other RF Remote to learn with Button0, it will overwrite previous codes. Please repeat above steps to learn other buttons. If it doesn't learn successfully in 1 minute, it will timeout and exit learning mode.
Notes: - Please keep the distance between RF Bridge and RF Remote within 30 meters.
- If you want to cancel the pairing buttons, please directly delete the RF Remote you have added.
- One RF Bridge supports to add up to 4 RF Remote.
4. Control RF Devices
- Click the buttons that have been learned successfully to turn on/off related RF Devices. For example, if you have paired an RF Remote (button A) with Sonoff RF Switch, by adding the RF Remote to RF Bridge via App. After learning buttonA of RF Remote with Button0 on the App. You can directly click Button0 on the App to turn on/off Sonoff RF Switch from anywhere at any time. Once you click the button, the red led will flash once, it means it has successfully sent the signal out.
- Note 1: you can't see device status changes on the App.
- Note 2: there's no pairing/learning order. So you can pair the RF Devices with RF Remote first, then pair the RF Remote buttons with RF Bridge on App or vice versa.
5. Add Alarm Sensor
To add a 433MHz PIR sensor, please install the battery into the sensor. Then put the sensor's detection side to no human being direction. Then click Add RF Remote on RF Bridge device, select Alarm and confirm. You'll see a new alarm device is added to the interface. Press and hold its icon, you'll hear a beep sound from the RF Bridge, the red led of RF Bridge will start fast blink, which means it has entered into learning mode. Then wave your hand before the PIR sensor so that it can detect human being and trigger to transmit signal. You'll hear two beep sounds, and the red led of RF Bridge will blink twice. This means the PIR sensor has learnt successfully.
To add a door sensor, the steps are almost the same. But to trigger the sensor to send signal, you'll need to close the two parts first, then separate them.
If you want to add other supported sensors, you'll need to make the sensor trigger signal to learn. The rest is the same.
6. Smart Scene (Android)
This kind of scene is usually called smart scene. Users can set a data range as a condition to trigger ON/OFF other devices. You may set a specified temperature/humidity/light intensity/sound level range from Sonoff SC, Sonoff TH, S22, At Home/Away status from Nest or RF Bridge's alarm message as a condition to trigger on/off one or more smart devices under your account.
In smart scene, RF Bridge 433 (Android 3.1.0 and higher)-the added Alarms can be set as the trigger device. RF Bridge 433 (Android 3.1.0 and higher)-the added RF Remote controller can be set as execute device.
7. Schedule/Countdown Timer
The RF Remote supports schedule and countdown timers. You can enabled max. 8 timers in total. Schedule timers helps to turn on/off the devices at a specified time, countdown timer helps to turn on/off the devices after a preset time.
Problems and solutions
Read the detailed FAQ on Itead Smart Home Forum. If below answers can't solve your problem, please submit a feedback on eWeLink.
1. My device has added successfully but stays "Offline".
Answers: The newly added device need 1-2 min to connect to your router and the Internet. If it stays offline for a long time, please judge the problem by the blue led status:
1.1. Blue led quickly blinks one time and repeats, which means device failed to connect to the router. The reason may be you have entered wrong WiFi password or your device is too far away from the router, which causes a weak WiFi signal. The device can not be added to the 5G-wifi-router, only the 2.4G-wifi is OK. At last, make sure that your router is MAC-open.
1.2. Blue led slowly blinks one time and repeats, which means the device has connected to router and server but failed to be added to the device list. Then power on the device again, if it still not working, just add the device again.
1.3.Blue led quickly blinks twice and repeats, this means the device has connected to the router but failed to connect to the server. Then please confirm your WiFi router works normally.
2. Why the APP can't find the device in pairing status?
Answers: That's because of your phone's cache. Please close the WLAN of your phone then open it after a minute. At the same time, please power off the device if you can, then power up to try again.
3. My WiFi is expired, can I connect the devices to LAN?
Answers: The device can not support to be controlled by LAN.
4. The green led keeps off, even if the device is powered on. Press the button but the device does not work.
Answers: The circuit may be broken, please send it back for testing. Return shipping postage and packaging will be at buyer's expense, if the device is damaged by the buyer, the buyer should bear extra repair cost.
5. Other problem can be feedback at the user center on the app. We will reply you ASAP.
How To Use Device List In Meye App
Source: https://ewelink.coolkit.cc/?p=886
Posted by: robinsongropen.blogspot.com
0 Response to "How To Use Device List In Meye App"
Post a Comment